
We use cookies to understand how the website is being used and to ensure you get the best possible experience.
By continuing to use this site, you consent to this policy.
About cookies
TUESDAY, FEB 04, 2020
Social Explorer offers a variety of geography selection tools for creating reports from maps or masking areas of interest. We’ve now added a brand new tool to our toolbox, the layers tool. Using this new feature, you can select the geographies from your uploaded dataset and easily create reports or masks for those specific geographies.
If you’ve uploaded your own dataset into Social Explorer and would like to create a report for the select geographies in your uploaded dataset, allow the layers tool to come to your rescue. Instead of manually selecting multiple geographies, the layers tool helps you layer the map with the geographies from your uploaded dataset. As long as your uploaded dataset contains lat/long coordinates or geocoded addresses, you’re all set.
We’ll show you how to use the layers tool for selecting geographies with the example of creating a report from Social Explorer maps. Here’s how to do it in six simple steps:
Open Social Explorer maps.
Click the More options button in the Change data menu.
Select Create report.
Select the geography level you’d like to map from the geography dropdown menu. The default State option will be displayed on the map if you do not make a selection.
Click on the layers selection tool (insert icon here) from our geography selection toolbox.
Click on the uploaded dataset from which you want to add the geographies for your data report. And, voila!
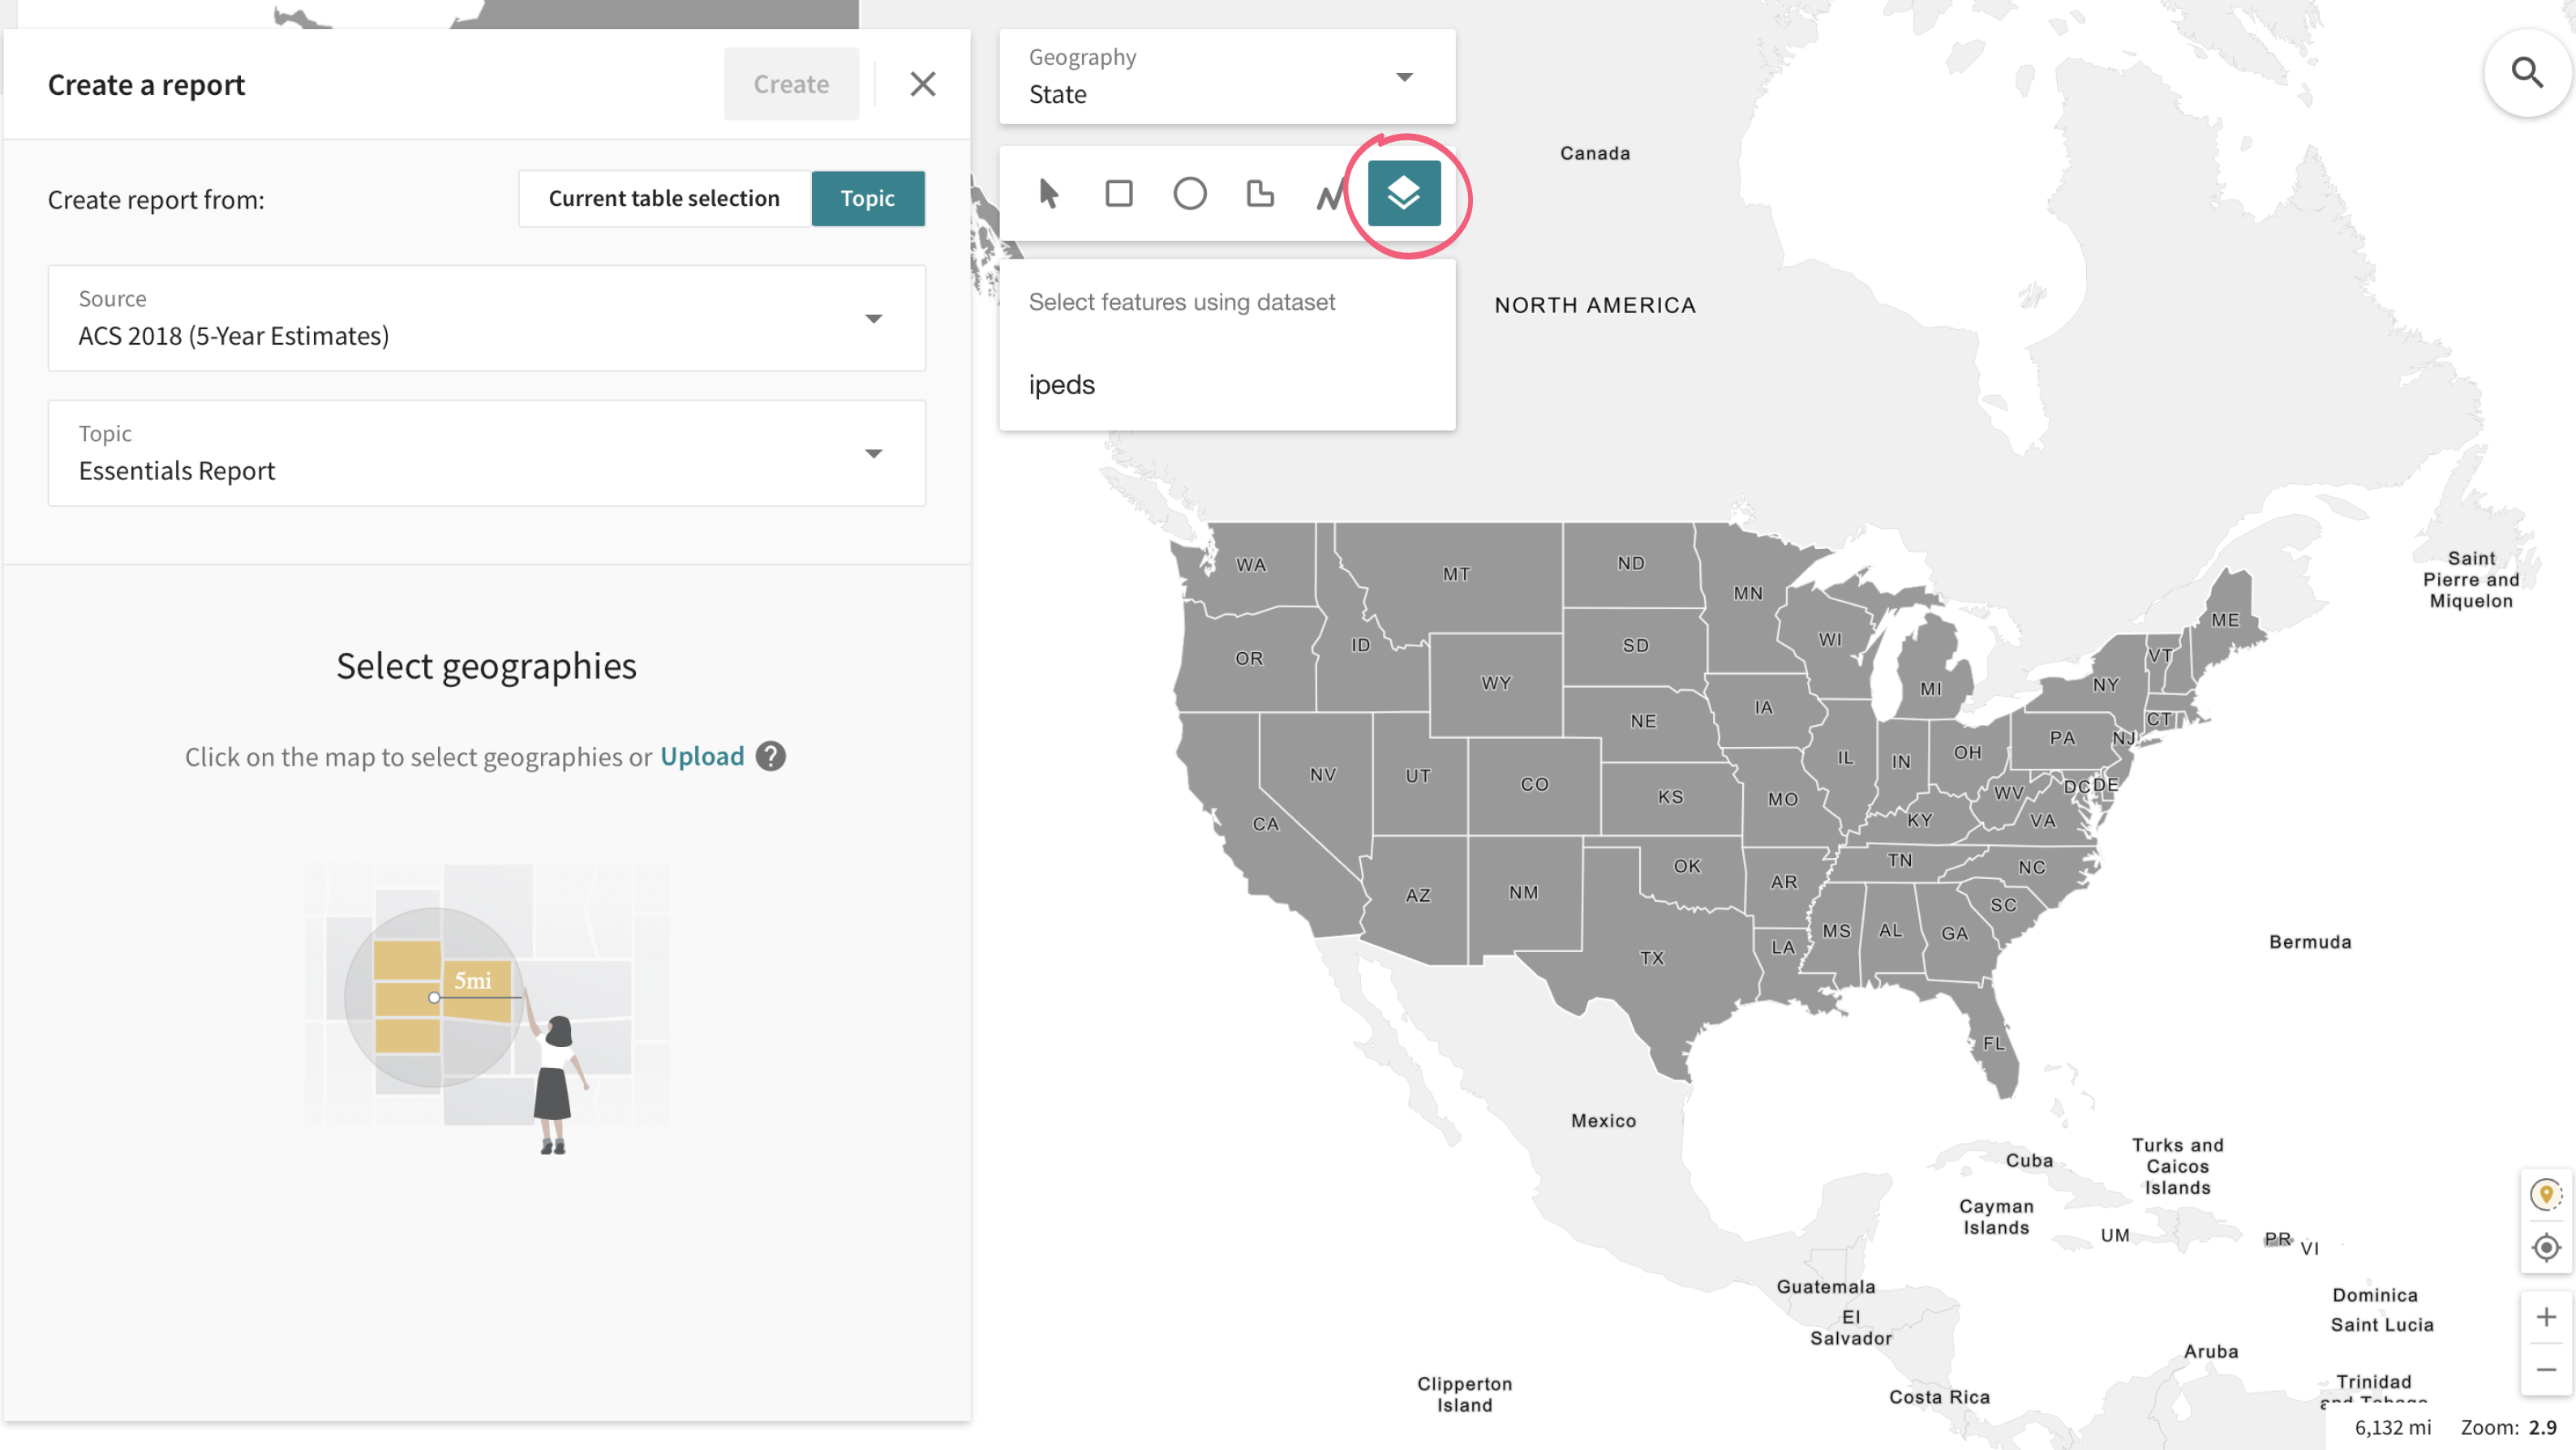
The prerequisite for this feature is to have a dataset that you’ve uploaded into Social Explorer. From there onwards, the layers tool has your back when it comes to selecting the geographies from your uploaded dataset.

Once the layers selection tool has applied a layer of the geographies from your uploaded dataset on to the Social Explorer map, click Create to create a report for your selected geographies. You can also deselect certain geographies or reset all selections if you like.
Social Explorer offers a number of selection tools to select geographies—rectangle, polygon, line, and circle selection tools—while creating reports or masking areas of interest. With the addition of the layers tool to our selection toolbox, you can now create a report or use the masking tool by easily importing geographies from your uploaded datasets.
The geography level dropdown menu allows you to play around with the geographic levels you’d like to include in your report. You can change the geography level to county or census tract if you’d like a report for the sub-geographies nested in your uploaded dataset.

The layers tool makes it easy for our users to select features using their uploaded dataset without having to select them manually.
Try out this exciting new tool on Social Explorer and tell us what you think. Use the Feedback option at the top of the map, or send us your suggestions, comments, and questions to feedback@socialexplorer.com.
Social Explorer also offers a number of helpful guides for using different features. Learn how to upload your data, use our selection toolbox, or create a report from a map.
Author: Amrapali Saha